

How To Install Sonarqube In Windows 10 Step By Step
SonarQube SonarScanner setup(Windows)

Basic Introduction : It is a open source tool which is used as continuous inspection of code quality and to perform static code analysis to detect bugs , code smells , vulnerabilities . It can report duplicated code, coding standards, unit tests, code coverage, code complexity, comments and it supports more than 20+ programming languages.
Steps to setup SonarQube in windows machine.
Step 1. Download Community edition from h ttps://www.sonarqube.org/downloads/
Step 2. Extract .zip file and navigate to bin folder
Step 3. Based on your machine configuration go to folder for 32-bit OS move to windows-x86–32 and for 64-bit OS move to windows-x86–64
S t ep 4. Run StartSonar.bat and after few minute it will start your SonarQube server.
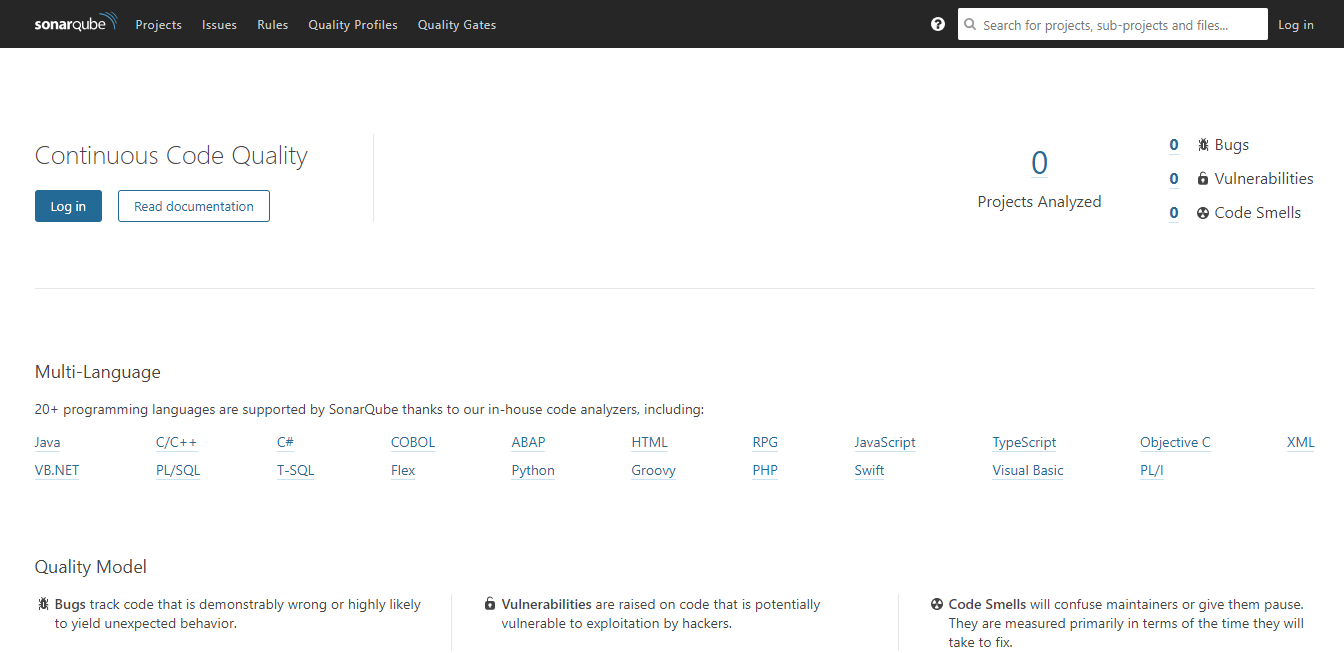
Step 5. Open browser and http://localhost:9000/ (9000 is default) you will be navigated to below window
Note: For any configuration changes go to conf folder and sonar.properties file. Here you can configure database, ldap, webserver, sso authentication, logging, etc…, e.g. for port — under webserver section I have added sonar.web.port=9005
Step 6. You can login using default user and password ( admin : admin )
If you want to integrate your SonarQube with Jenkins for Continuous Inspection and Continuous Integration you can read my blog — https://medium.com/@amitvermaa93/jenkins-sonarqube-integration-129f5c49c4ca
Sonar Scanner : If you want to scan any project standalone just follow the steps
Step 1. Open and download Sonar Scanner from below link https://docs.sonarqube.org/display/SCAN/Analyzing+with+SonarQube+Scanner
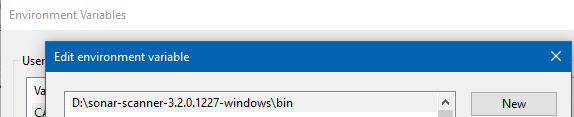
Step 2. Unzip the file (in my case its in D drive so D:\sonar-scanner-3.2.0.1227-windows) and navigate to its bin folder and add Path to environment variables of system and Save
Path — D:\sonar-scanner-3.2.0.1227-windows\bin
Step 3 : Navigate to config folder of sonar scanner (D:\sonar-scanner-3.2.0.1227-windows\conf) here you will get a sonar-scanner.properties file. To keep it simple I have used only three properties(as below), sonar.host.url property tells the url of Sonar server to post analysis report after scanning , sonar.projectKey property will create a project inside your SonarQube server with the same name if project don't exist else it will append analysis to it, sonar.sources property defines that which folder to scan. You can provide either relative path or actual path to the folder you want to scan.
Edit it and add below lines
sonar.host.url=http://localhost:9000
sonar.projectKey=sonar-scanner
sonar.sources=D:/CodeBase/sharebook-Client/src
Note : This property file will be project specific . It contains certain sonar properties like which folder to scan, which folder to exclude in scanning, what is the project key and many more you can see it from https://docs.sonarqube.org/display/SCAN/Analyzing+with+SonarQube+Scanner
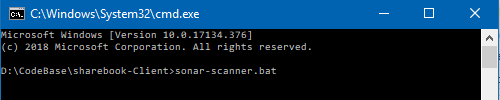
Step 4. Now navigate to the Project folder of you code you want to scan (D:\CodeBase\sharebook-Client) open command prompt on this location and run command sonar-scanner.bat as in below image.
Step 5. After successful analysis you will see it has posted the result to your SonarQube server http://locathost:9000/ with new project inside it you have mentioned it in sonar.projetKey

How it works : When we run command sonar-scanner.bat from Project location it will find the Path from system environment variable and then sonar scanner will read its properties file from conf folder (sonar-scanner.properties). It scans the source path you have provide and finally it posts the analysis report to SonarQube server url with the project key mentioned.
How To Install Sonarqube In Windows 10 Step By Step
Source: https://medium.com/@amitvermaa93/sonarqube-setup-windows-e6a6c01be025
Posted by: mcghiesant1952.blogspot.com
0 Response to "How To Install Sonarqube In Windows 10 Step By Step"
Post a Comment